How Integrations Work

If you are looking for an integration not already in Appy.AI, contact support. Appy has hundreds of integrations ready to enable.
The Subscriber Experience

- Your agent will explain what it needs to connect
- The subscriber clicks “Connect” to authorize the integration
- They’re redirected to the service (like Gmail) to grant permissions
- Once authorized, they return to the conversation and your agent can immediately help
Managing Connections

- View all connected accounts in one place
- Disconnect services they no longer want your agent to access
- Reconnect accounts if permissions expire
- See what actions your agent can perform with each integration
Integration Security
Depending on the integration, connections use secure OAuth authentication or securely store an API key provided by the users - the AI never sees or stores your subscribers’ passwords. Each integration only gets access to the specific actions you’ve configured, and subscribers can revoke access anytime.Configure with Violet (Chat)
Ask Violet to set up integrations:- “Add Gmail integration so my agent can read and send emails for users”
- “Enable Google Calendar with actions to create events and check availability”
- “Add Slack integration with the ability to send messages and list channels”
- “Update my Webflow integration to also allow Site Publishes”
- “Remove the Airtable integration, we don’t need it anymore”
Configure Manually
Access integration settings directly through Behavior-> Add Integrations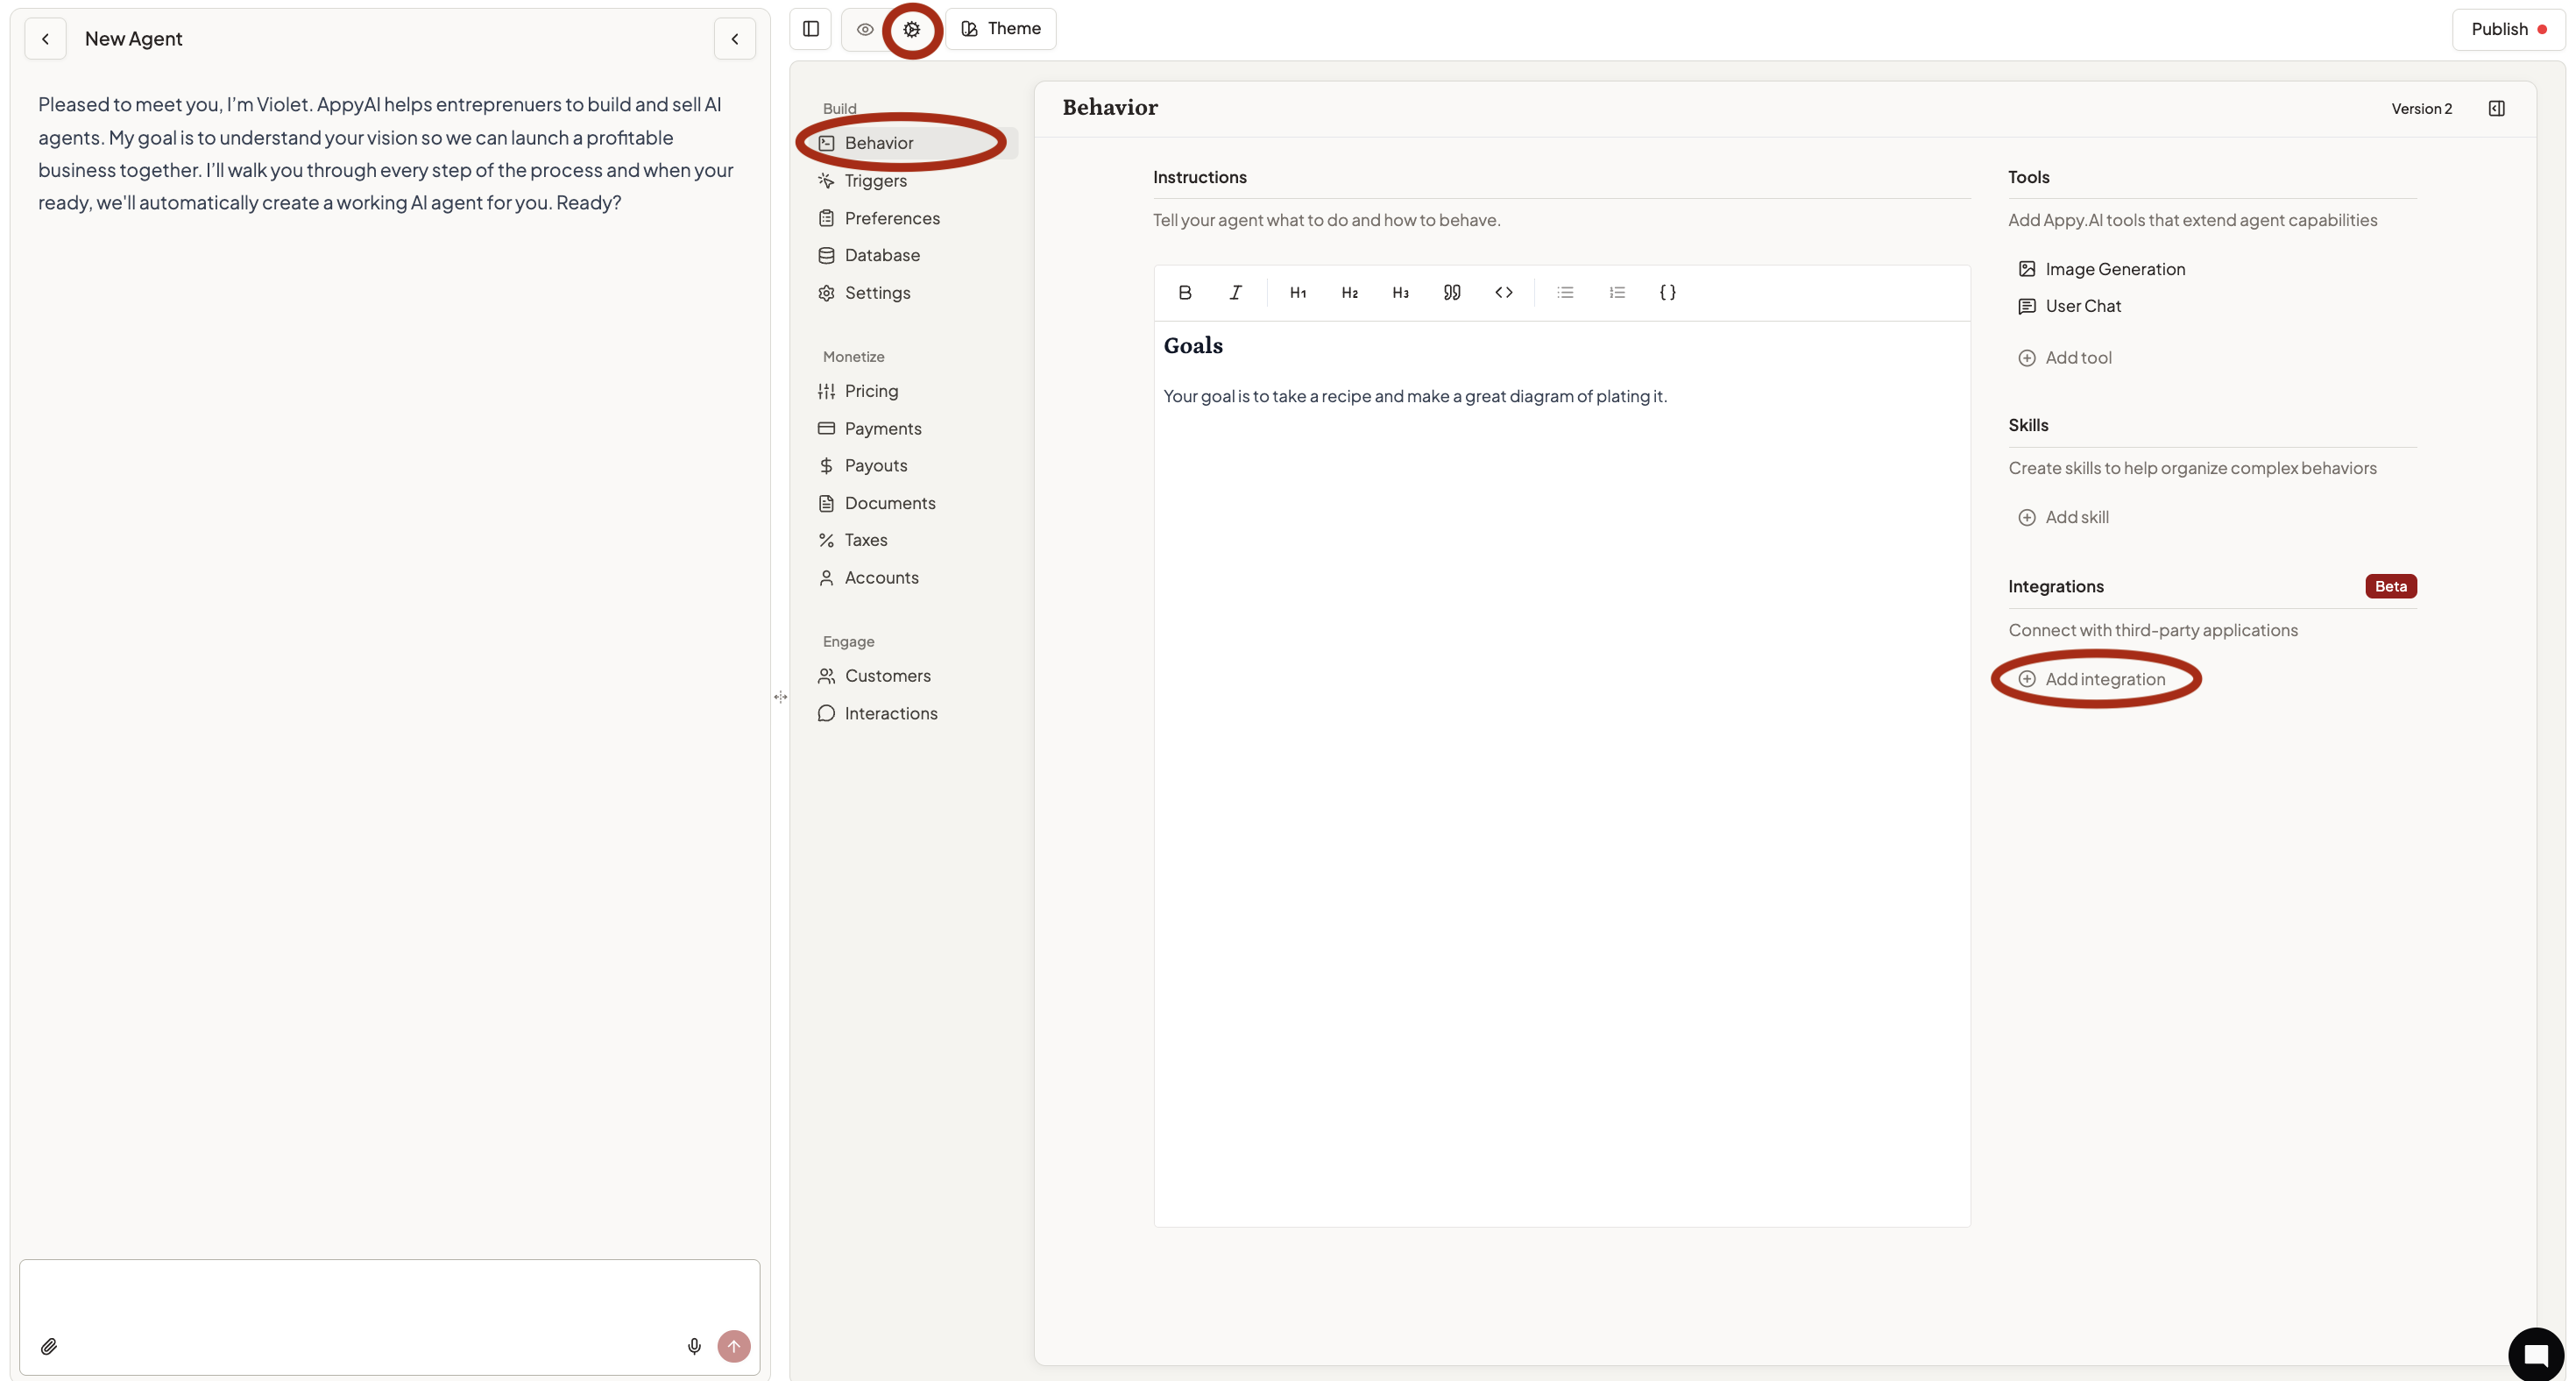
- Open your agent builder and navigate to the Behavior section
- Click on ‘Add integration’ in the right panel to see available integrations
- Select the integration you want your agent to offer (Gmail, Google Calendar, Airtable, etc.)
Add Actions
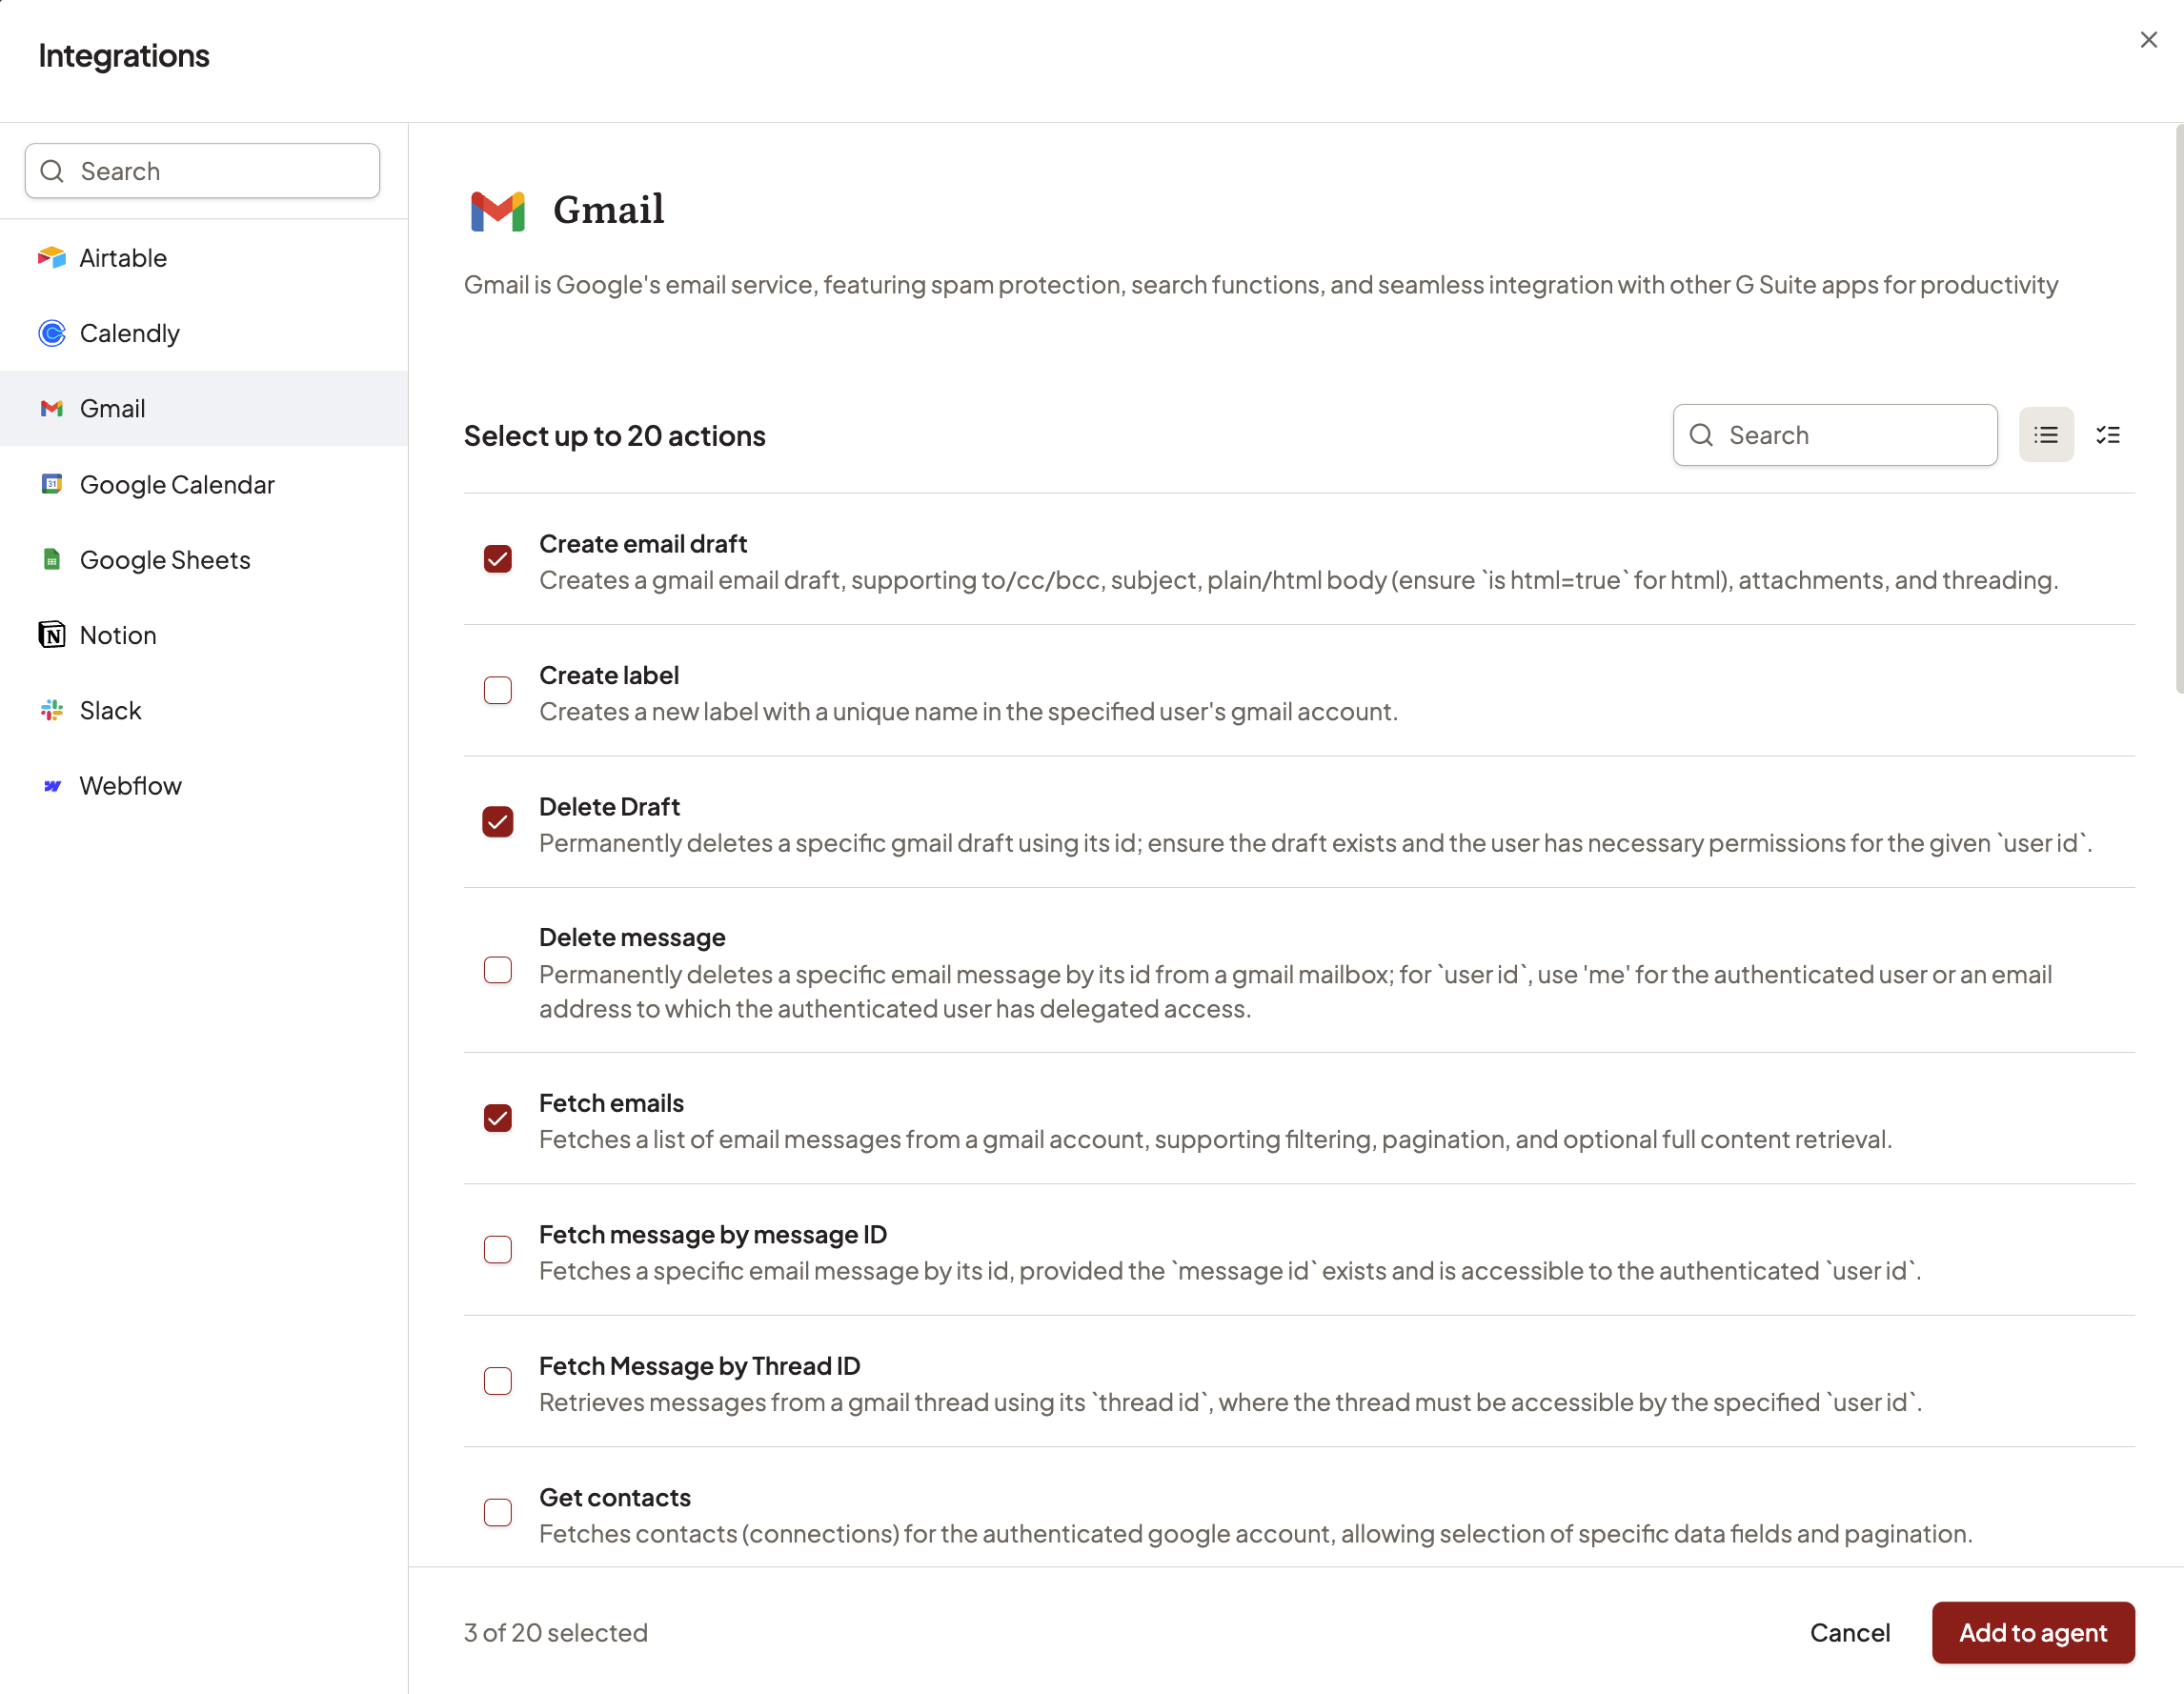
- Browse or search available actions and read their descriptions
- Choose the actions that align with your agent’s purpose
- Select up to 20 actions from the available options (like “Fetch emails,” “Create email draft,” “Get contacts”)
- Click add to agent
- Save to add the integration and actions
Make sure to closely consider actions including ‘List’ and ‘Get’.Lists help your subscribers to access the integrated applications in common language (e.g. give me a list of all my Slack channels), rather than needing to provide information such as IDs to your agent.
Testing Your Setup
Before going live, test the integration flow by connecting your own accounts and ensuring the agent can perform the actions you’ve configured.- Click on an integration
- Add or remove actions
- Add to agent and re-save
Include instructions for your agent that help your customers know how to use the integration.
Getting Started
- Start simple - Add integrations you know well and that your agent will use for precise purposes
- Configure 3-5 key actions rather than enabling everything at once
- Test thoroughly with your own accounts before launching
- Update your agent’s instructions to mention the new capabilities it has with integrations