Documentation Index
Fetch the complete documentation index at: https://help.appy.ai/llms.txt
Use this file to discover all available pages before exploring further.
Launch in minutes, not months
The entire process from start to finish:Step 1: Create your agent
Step 1: Create your agent
Chat to describe what your user does and how it behaves. Write in plain English - no technical skills required.Violet, your chat co-pilot will help you:
- Add Skills & Tools: Select from our library of built-in tools and create custom skills for specialized tasks your agent needs to perform.
- Set Up Personalization: Configure the preferences you want to collect from customers during their onboarding to make every interaction perfectly tailored.
Step 2: Share for beta testing (optional)
Step 2: Share for beta testing (optional)
Step 3: Publish your agent
Step 3: Publish your agent
One-Click Launch. Hit the publish button to make your agent live and available for subscribers.
- Free agents: Subscribers create accounts and use your agent at no cost (Pro and Scale plans)
- Paid agents: Set up monetization first to charge subscribers (Scale plan only)
- Instant Availability: Your agent is immediately ready to serve subscribers once published.
Step 4: Promote and grow
Step 4: Promote and grow
Use the signup URL from the Promote section to drive subscribers to your agent.
- Custom URL: Your agent lives at
yoursubdomain.appy.ai - Scale from Day One: The platform handles all the technical complexity, so you can serve one subscriber or thousands with the same effort.
What happens next
Once published, you can:- Monitor subscriber signups and interactions in the Engage section
- Track revenue and manage payouts in the Monetize section (Scale plan)
- Refine your agent based on feedback and usage patterns
- Scale your marketing efforts using the professional links provided
Two modes: Chat (Violet) or Manual
As you work with your agent, you can move between using a chat to easily update your agent, or viewing a manual-UI to change aspects of your agent’s behavior: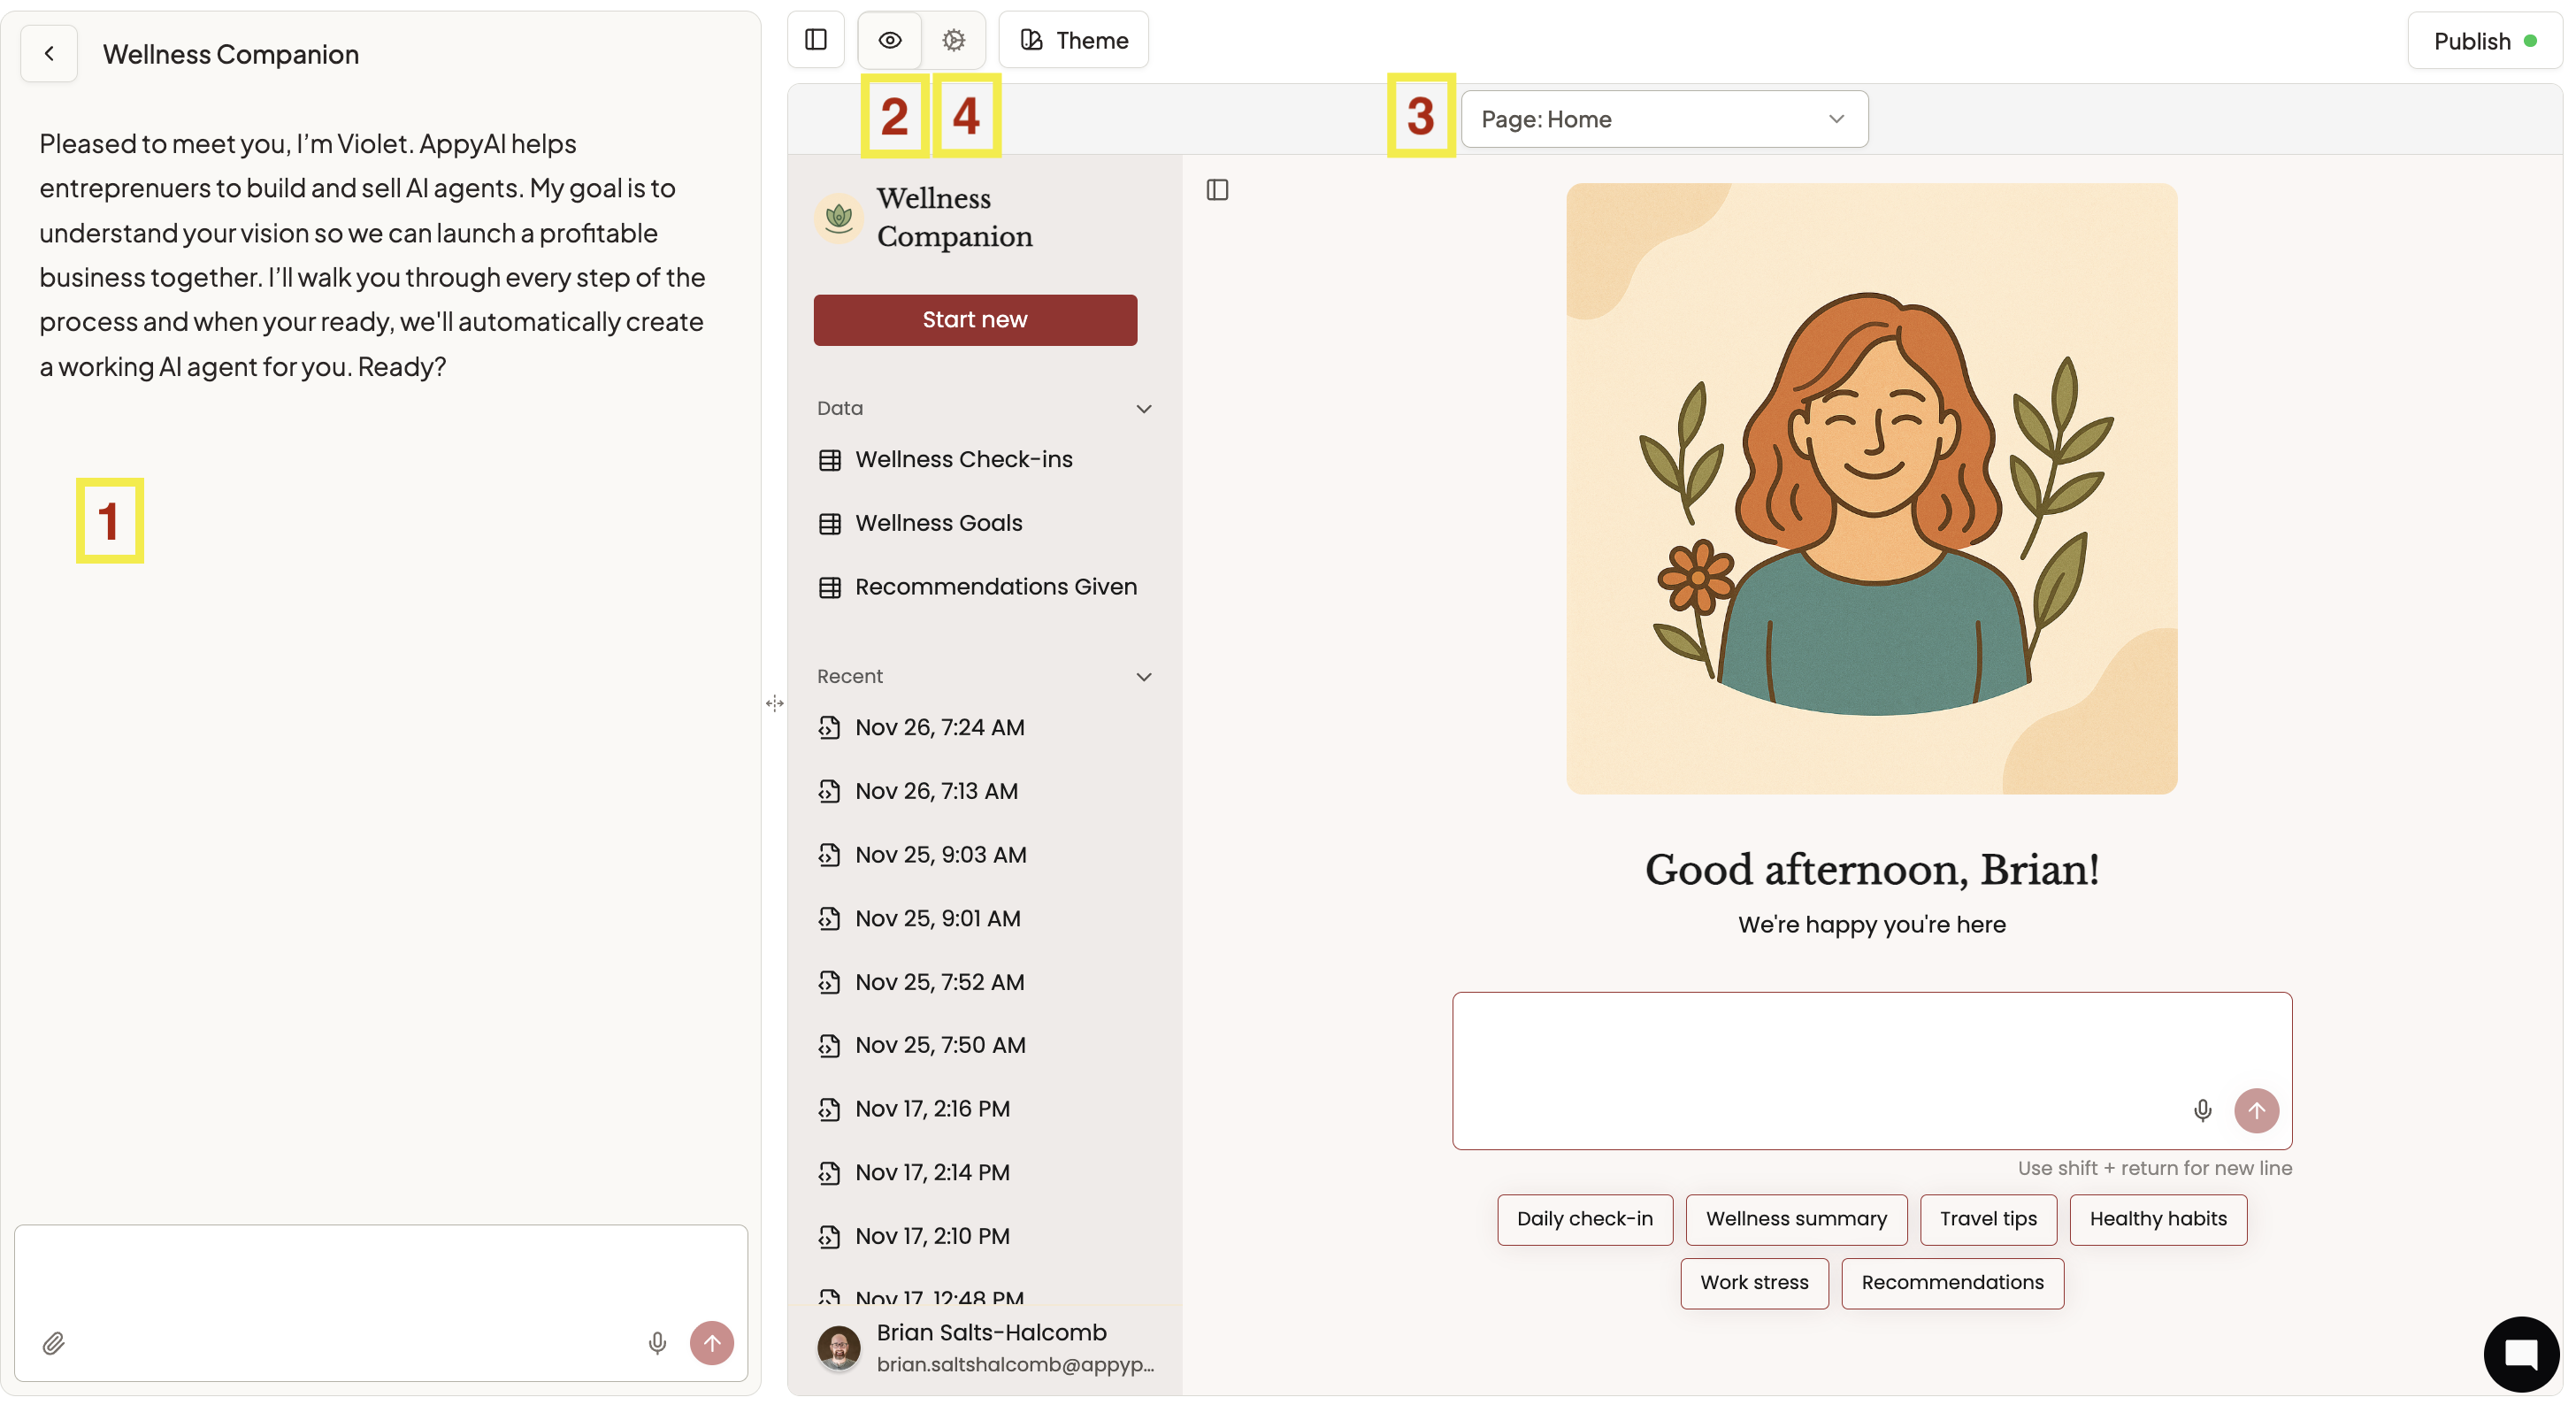
- Chat with Violet, your co-pilot via the chat panel on the left
- Click the eye icon to preview how your agent looks and functions
- Toggle between your agent home, your website, and other aspects of your customers’ experience
- Click into manual mode to see the specific prompts and settings that are driving your agent
Pro tips for quick launch
- Start Simple: Begin with core functionality and add complexity as you learn what subscribers need most.
- Use Preview Extensively: Test every aspect of your agent before publishing to ensure a smooth experience.
- Share First: Get feedback from beta testers before publishing to subscribers.
- Price Confidently: If monetizing, you can always adjust pricing based on subscriber response and value delivered.